
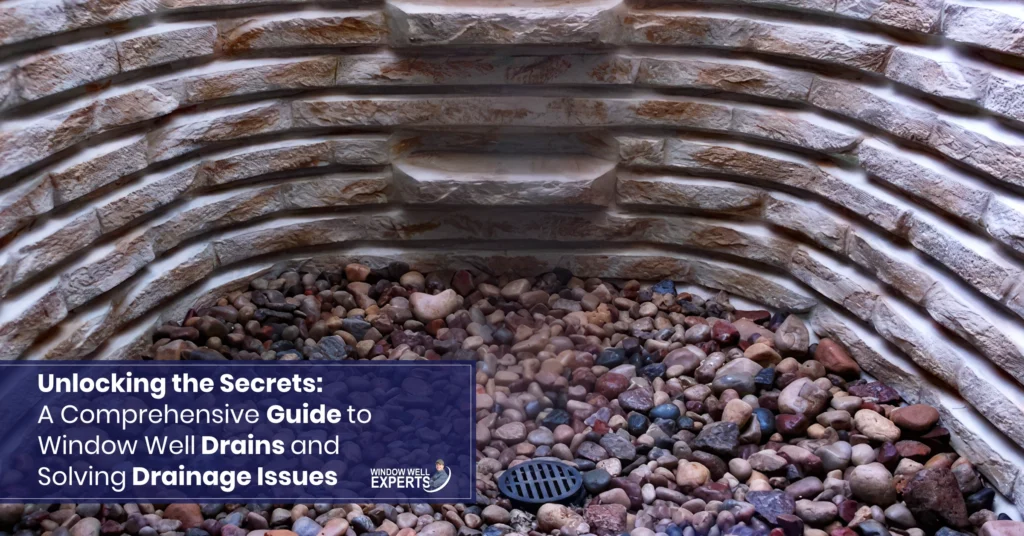
If you are planning a window well installation or replacing an old one, the drainage decisions you make now are what keep water out later. In the photos on this page, you can see water rising in a homeowner’s window well, first creeping toward the lower sill of the basement window, then spilling past it. That is the moment drainage stops being a small chore and turns into a threat to your home.
A working window well drainage system protects the health of your basement. When a well fills up, water usually finds its way in around the window, leading to mold growth, and, over time, structural damage. We have seen wells where the pressure built up so much that it pushed the basement window in completely and flooded the room. The good news is that most drainage problems are easy to prevent once you understand how the system works.
How Basement Window Well Drainage Works
When you buy a window well, make sure it is deep enough. Additional depth gives water somewhere to sit while it soaks into the soil. Think of the base of the well as a small sink that collects rain and snow melt, then lets it drain down slowly. Skimp on depth and you invite standing water, leakage, and a drainage problem you will keep fighting.
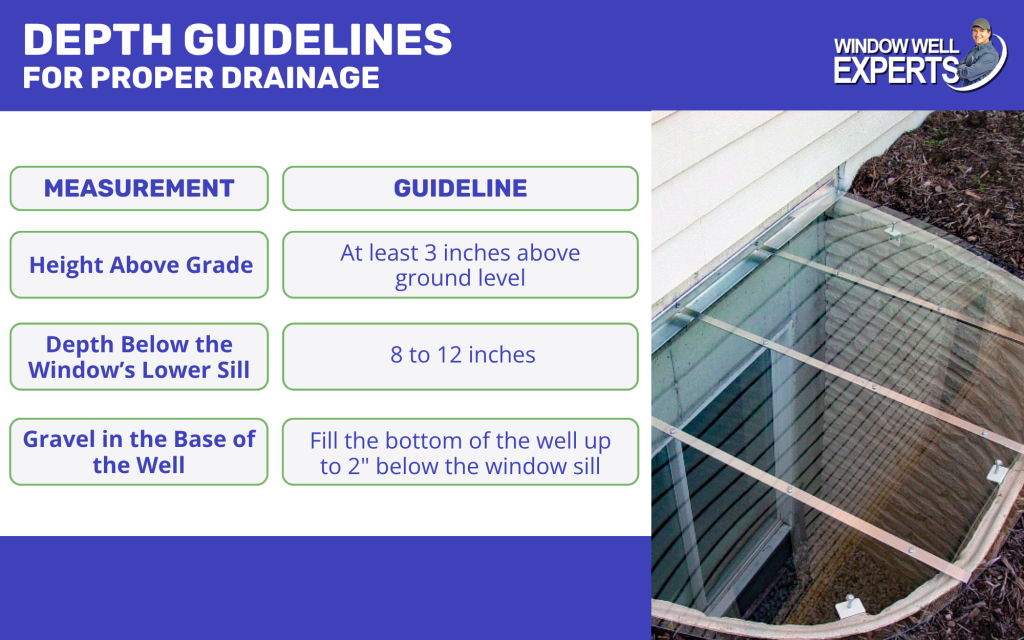
For proper drainage, plan on at least 3 inches above ground level, more if your home sits on a slope or a wet lot, along with 8 to 12 inches of depth below the window’s lower sill, and gravel filling the space at the base of the well up to 2” below the window sill. Get these numbers right and most window wells drain on their own with very little fuss.
Passive vs. Active Window Well Drainage
Window well drainage comes in two forms: passive and active. Most homes use passive drainage, and it works well when the soil absorbs water at a normal rate depending on soil types Loam and sandy soils drain well and active drainage is rarely needed. Active drainage adds a connection to a drain tile around the foundation that carries water away, which helps in wetter conditions and is very helpful with heavy clay soils.
Plan the drain path before the well goes in. If you are retrofitting a drain into an installed well, the well does not need to be removed. The decorative gravel at the bottom of the well will need to be removed, and careful hand digging is necessary to reach the drain tile. As always, check to see if a building permit is needed.
| Passive Drainage | Active Drainage | |
|---|---|---|
| How it works | Water seeps through gravel into the subsoil | A well drain ties into a drain tile or drain system |
| Best for | Yards with good natural water absorption | Heavy rain areas or yards with slow-draining soil |
| Effort | Simple DIY with a gravel base | Careful installation near the drain pipe |
| Upkeep | Keep the well clear of debris | Keep it clear and protect the drain cap |
Passive Window Well Drainage
As the cross-section diagram below shows, 8 to 12 inches of gravel in the bottom of the well is usually enough to let water pass through to the subsoil. This is the easiest DIY drainage system. It relies on two things: soil that absorbs water and a clear window well.
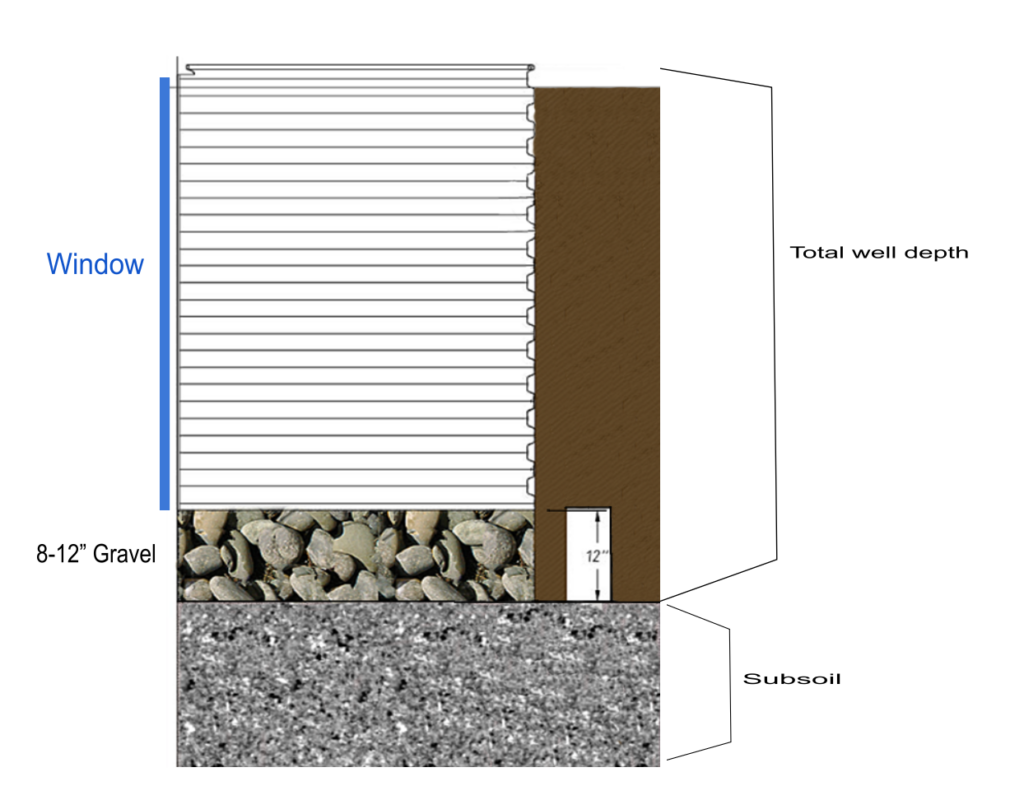
Passive drainage does ask for some attention from the homeowner. Keep yard debris and trash out of the base of the well. Once leaves pile up more than a half inch deep, they mat together and act like a plug in a drain. Water then backs up, which can rust a metal well and rot any wood trim around the window from constant moisture.
Active Window Well Drainage
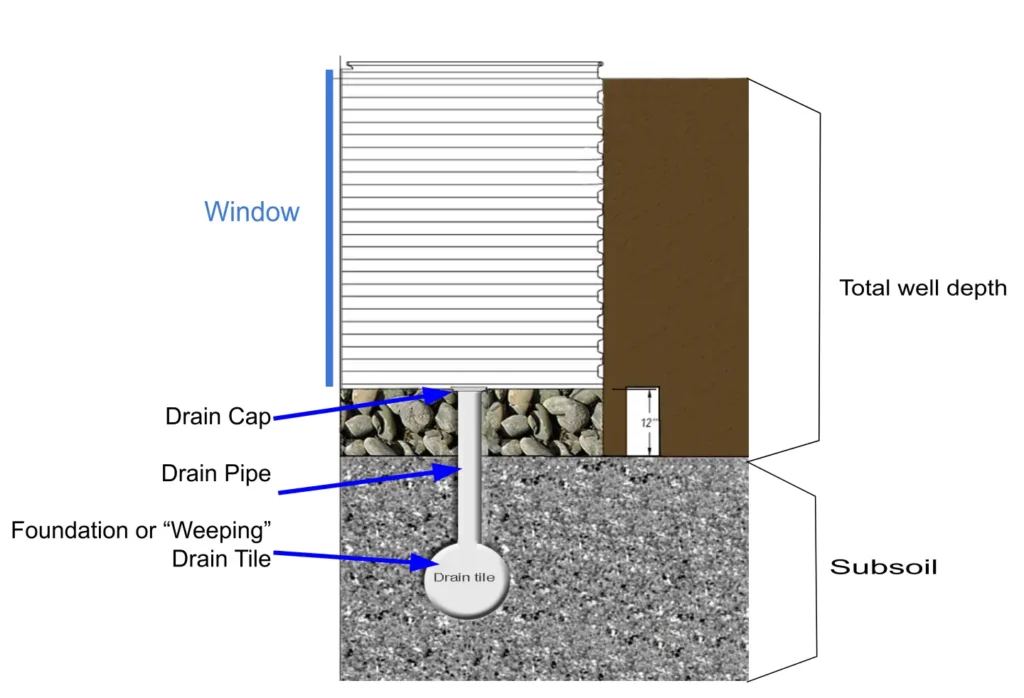
Active drainage takes a bit more care up front. If your home has an external foundation drain tile, it’s a smart move to tie your window well drain into that line. In areas with heavy rain, a properly installed drain keeps window wells much drier.
If you join a well drain into the drain tile, keep these points in mind:
- Excavate carefully during installation so you do not damage the tile.
- Do not clear the gravel near the drain tile with a machine.
- Note how deep the gravel sits around the tile before you clear it.
- If the tile has a fabric “sock” to block sediment, cut only as much as you need to tie in the drain.
- Replace the gravel around the drain tile to its previous level before backfilling with subsoil, and firm the subsoil as you go, up to 8 to 12 inches below the lower sill.
- Keep 8 to 12 inches of gravel in the bottom of the well , and never cover the drain cap with gravel.
- Install the well according to the directions.
In wetter regions, a window well drain does not have to stop at the exterior drain tile. It can tie into a perimeter drain, a French drain, or an interior drain tile system that routes water to a sump pump. While tying into an exterior drain tile is typically straightforward, modifying drainage systems, especially interior systems with a sump pump, is best left to professionals.
Common Window Well Drainage Problems and Solutions
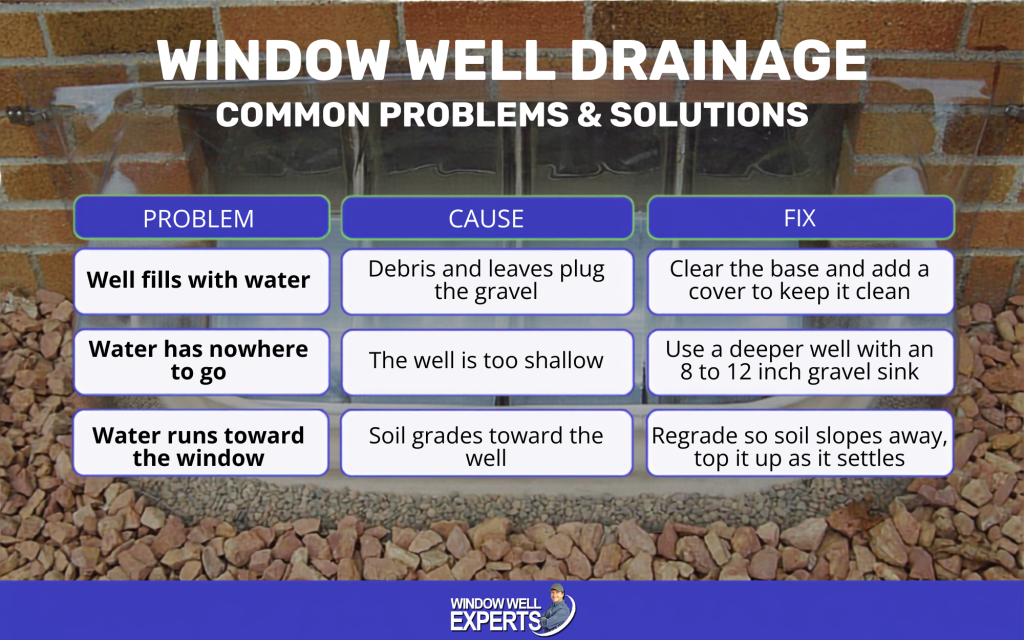
Most drainage trouble traces back to one of three causes: a layer of debris blocking the gravel in the base of the well, a well that is too shallow to hold water while it drains, or soil that grades toward the house instead of away from it. Here is what each one looks like and how to correct it.
Debris in the Bottom of the Well
This is the top cause of a flooded well. When more than a half inch of yard waste collects in the base, it sticks together like wet newspaper and stops water from trickling down through the gravel. The water then sits on top of the mess like a sink with the stopper in.
A Well That Is Too Shallow
A shallow well leaves water with nowhere to collect. There is no catch basin, so once the soil at the bottom saturates, the water heads for the point of least resistance. That path usually leads around the window and onto your basement floor.
There are two solutions for a well that is too shallow.
- Do a little digging–carefully remove the gravel from the inside of the window well. After the gravel is out of the way, see how far the window well extends below the window sill. It could be that over time, enough dirt and sediment can accumulate and fill up the “sink”, keeping the well from draining correctly. Removing the dirt to the original depth and replacing the gravel will not only restore proper function to the well, but give a fresh view from the inside.
- If the well does not go down 8-10” below the windowsill, or if the well is in bad shape, consider replacing it.
Incorrect Grading Around the Well
Look at how the soil sits around your well. It should slope away, not toward it and there should be 2-3” of well above the grade. When backfill settles or washes over the well ledge, nothing stops runoff from pouring straight into the well and against the window and foundation wall. After installation of a new well, check the outside of the well periodically and add soil where you see erosion or settling. This keeps the well from shifting or collapsing. Once the grade settles , landscaping and mulch help lock the soil in place and dress up the area.
Egress Window Drainage
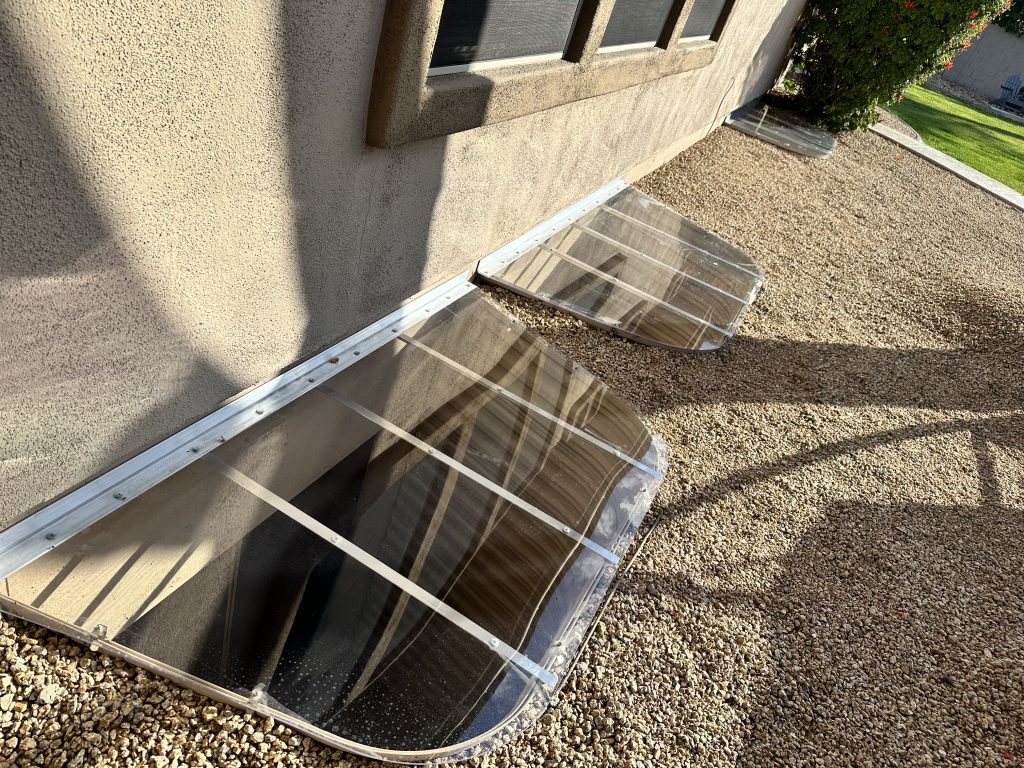
Although basement egress windows are deeper, wider wells so people can climb out in an emergency, the same sizing rules apply. A larger window opening is a code requirement for any finished basement room, but those same dimensions can change how the well handles water..
Why Proper Window Well Drainage Matters
A bigger footprint collects more rain and snowmelt, so care must be taken to be sure that any window well, no matter what it is made of, must be at least 8-10” below the windowsill and, just as important, 2-3” above the soil. Gravel alone may not be enough. In any well, a gravel base gives water somewhere to go while it soaks in. All window wells have this same need, no matter what the size. Depending on your soil type, many homes may need a drainpipe or perforated pipe running from the base of the well to the perimeter drain or a sump pit. An exterior French drain along that side of the foundation can also help in yards with poor drainage. Ladders collect debris. A permanent egress ladder must be attached to the wall of any egress-sized window well for emergency escape. Keeping your ladder free from debris is only common sense and is an easy way to protect your household.
The Ultimate Solution: Window Well Covers
As you have read, keeping the base of the well clear is the heart of good drainage, drain or no drain. A window well cover is the easiest way to do that. It blocks the leaves, dirt, and other trash the wind sends your way from settling in the bottom of your well. Some styles also help keep water out.
Here is how three popular options compare:
| Cover | Best for | Helps with |
|---|---|---|
| Sloped Window Well Cover | Nearly any well except for wells with crankout windows that come above the rim of the well. | Up to a 2 inch slope sheds water and blocks most debris |
| Atrium Dome Cover | Crank-out windows above the well lip | Lets the window open freely while blocking debris |
| Super Slant Cover | Wells that need airflow | Keeps out most debris, rain, and snow while still allowing ventilation |
Sloped Window Well Cover
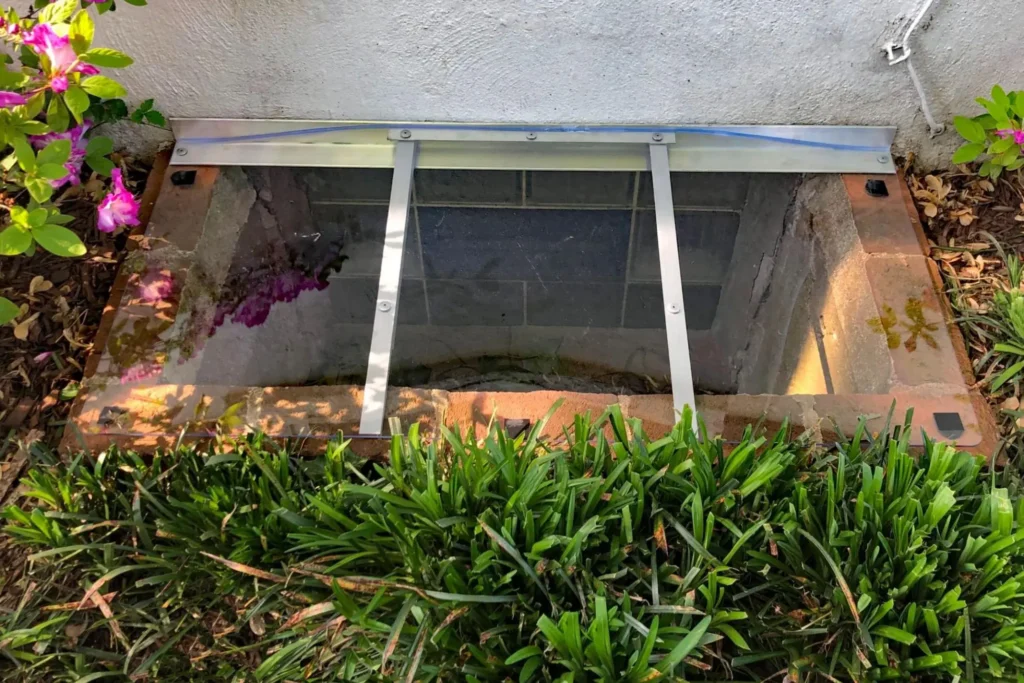
The Sloped Window Well Cover has up to a two inch slope that guides water away from the well. The fit also keeps most dirt and debris out. It protects most wells, depending on your window type.
Atrium Dome Cover
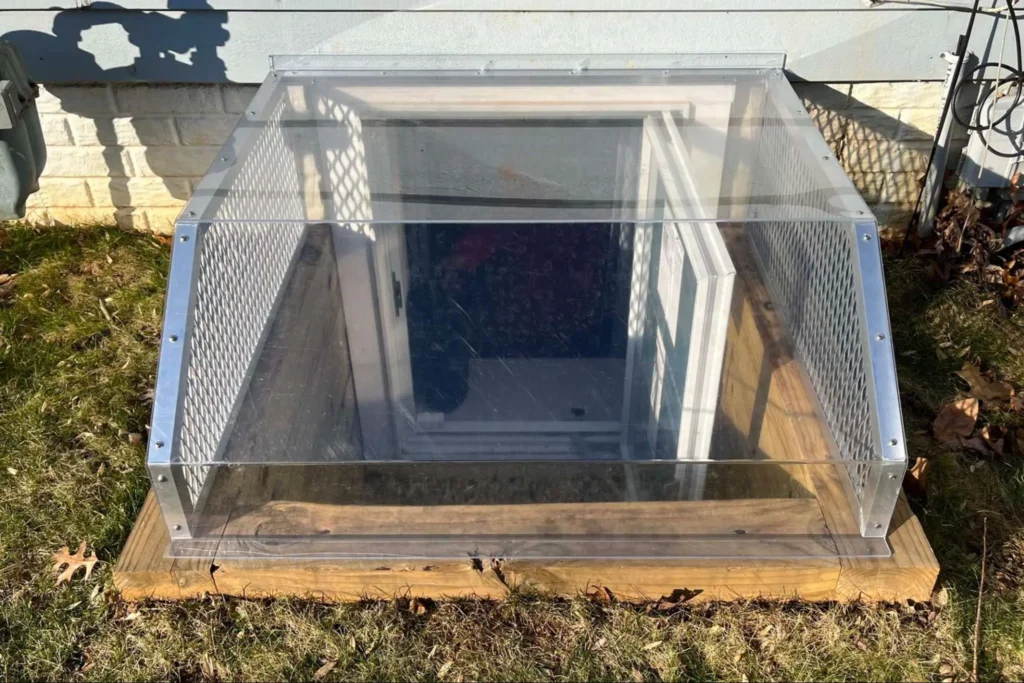
If you have a crank-out window that sits above the lip of the well, an Atrium Dome Cover gives the window room to open freely while still keeping debris out.
Super Slant Cover
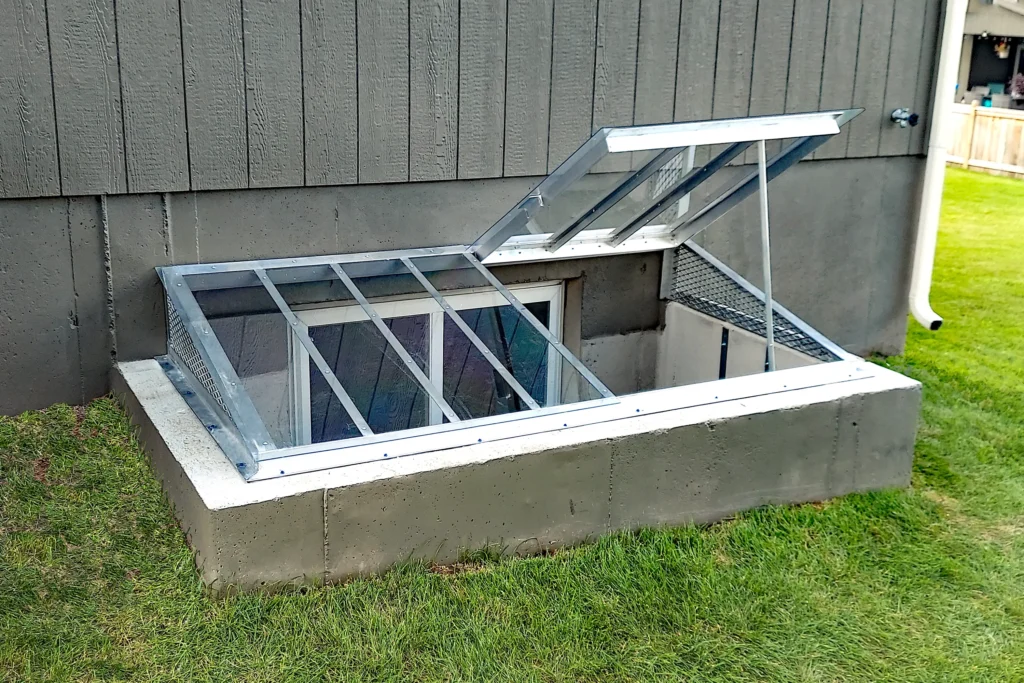
Super Slant covers are a strong all-around choice. They block most debris, rain, and snow, and they still let the well breathe, bringing fresh air into the basement below.
A good cover can make window well drainage problems almost disappear. Window Well Experts ships covers nationwide, and every cover is backed by our lifetime warranty. Call us at 1-888-650-9355, to get your questions answered, or request a free estimate to find the right cover for your well.
Keep reading: For ideas on dressing up your wells with decorative materials, landscaping, and lighting, see How to Make Your Window Well Look Beautiful. If safety is on your mind, read Enhancing Home Safety with Egress Ladders for a look at ladder types and installation.